
The remaining experiments in this tutorial delve deeply into some of Finale’s powerful MIDI capabilities. If you don’t thrive on technical discussions, feel free to skip ahead to Expressions: Defining Playback later in this chapter.
The MIDI tool menu Play command does not support Internal Speaker Playback on the Mac. Use the Playback Controls.
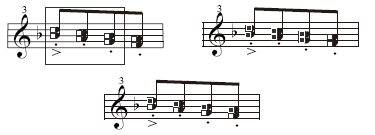
Here’s a quick rundown of the remaining MIDI tool menu commands. These descriptions assume you’ve first selected the music to be edited. Remember that when you’re not in the MIDI tool split-window, you select measures exactly as you would with the Selection Tool—by clicking a single measure, drag-enclosing several, and so on. Within the MIDI tool split-window, you can edit a single staff, and you select notes either by dragging through the graph region or by selecting individual note handles in one of the ways shown here:

To select individual notes in the MIDI Tool split-window, you can drag-enclose them or SHIFT-click individual handles, or SHIFT–drag-enclose additional groups of notes.
Once you’ve selected the music, you can choose any of the MIDI tool menu’s transformation commands from below the line.
Set To gives every note in the selected region exactly the same velocity (volume). You type a number between 0 and 127.
Scale produces a smooth, gradual change from one velocity value to another across the selected region. If you select “Absolute,” you can enter values in the text boxes between 0 and 127. If you select “Percent of Original,” Finale scales the selected notes’ velocities proportional to their current values, thus preserving some of the original variations from note to note; in this case, you can enter virtually any positive numbers in the text boxes. For example, if you entered 100 and 200 in the boxes, respectively, the first notes would play back with their original velocities, and the last notes would play back with twice their original velocities.
Add simply gives the selected notes greater velocity than they already have. If you enter a negative number, you subtract velocity. Type a number between –127 and 127, keeping in mind that the sum of this number and a note’s current velocity has to be between 0 and 127.
Percent Alter increases or decreases the selected music’s velocity by a percentage of its current value. To make a passage twice as loud as it is now, choose Percent Alter and type 200 (percent).
Limit lets you set maximum and minimum key velocity levels for the selected music. You type in numbers between 0 and 127. If you enter a maximum velocity of 90, for example, any existing velocity values between 91 and 127 will be clipped down to 90.
Alter Feel lets you accent specific beats in the measure, by either a specified amount (Absolute) or by a percentage of their current velocities (Percent of Original). If you enter negative numbers (when Absolute is selected), you’ll be giving the specified music less velocity, and hence less emphasis. In the Alter Feel dialog box that appears, you’ll see that you can provide either an absolute or a percentage change independently for notes that fall on Downbeats, Other Beats, or Backbeats. (For definitions, see Backbeats in the User Manual.)
As an example, suppose you have a rockabilly tune and you want to boost the backbeats to give your playback more drive. In this case, you’d select the entire score (with the MIDI tool), choose Key Velocities and Alter Feel from the MIDI tool menu, select Percent of Original, and type 150 into the Backbeats text box. The result would be 50% more volume on the backbeats.
Randomize alters the selected music’s velocity by a random amount. This can be a useful option if you want to give your playback a more imperfect, “human” feeling. Type a fairly small number into the text box—between 10 and 20, for example (unless you really want some unpredictable, madcap accents).
NOTE: Finale stores the velocity value for each note as the difference in velocity from the default velocity value (the “Base Key Velocity”). You set the Base Key Velocity in the Playback Controls. Suppose, for example, that this value is 60. If a note displayed in the MIDI tool window has a velocity of 90, Finale simply remembers that its velocity is 30 more than the Base Key Velocity value. Why does Finale store velocity values this way? Because with this system, you can quickly and easily adjust the overall velocity (volume) level of your piece by changing the Base Key Velocity value. The dynamic nuances of your piece will be preserved—but the overall volume level will increase or decrease accordingly.
| User Manual Home |

|