|
L'aide française est disponible au format PDF en cliquant ici (ou dans le Menu "Démarrer", Finale 2010, Documentation PDF française)
Le tutoriel français est disponible au format PDF en cliquant ici.
La mise à jour de l'aide française au format HTML sera disponible prochainement.
|
Traduction française :

|
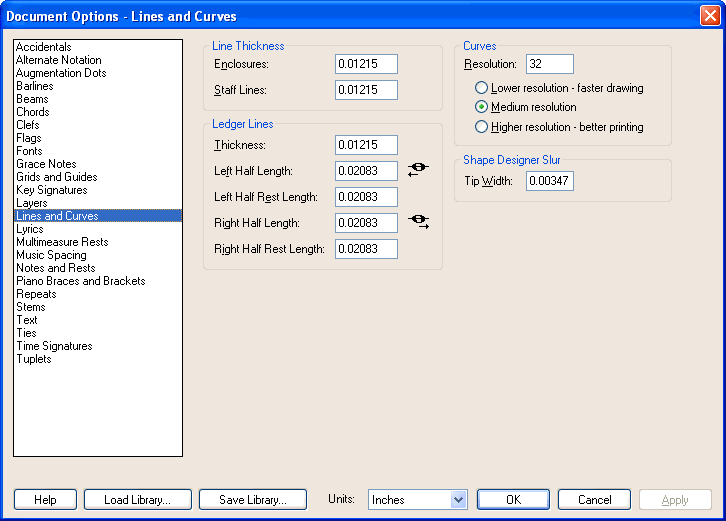
Document Options-Lines and Curves dialog box

How to get there
From the Document menu, choose Document Options and select Lines and Curves.
What it does
Lines means staff lines, ledger lines, underlines, and so on. Here, you can change their thickness. In the Curves section, you can specify the resolution for curves displayed on the screen and for Non-PostScript printers. The resolution settings apply to all slurs, ties and curves for on-screen display and non-PostScript printing.
- Line Thickness: Enclosures • Staff Lines. In these boxes, enter the desired thickness for enclosures and staff lines.
- Ledger Lines: Thickness • Left Half • Left Half Rest • Right Half • Right Half Rest. Enter a value after Thickness to globally set the thickness of ledger lines. For the remaining parameters in this section, you can specify the lengths of the left and right halves of ledger lines independently— that is, the portion that protrudes from the left and right sides of the note or rest. A positive number makes the ledger half longer.
- Resolution • Lower Resolution • Medium Resolution • High Resolution. Technically speaking, these settings determine how many tiny, vertical line segments Finale uses to compose the display of each slur, tie, and brace. Instead of clicking one of the three general-setting buttons, you can also enter a number from 1 to 128 directly into the Resolution text box. The higher the number, the finer the resolution of these curves will be—but (as indicated in the wording of the dialog box) the longer it’ll take the program to draw them on the screen. For that reason, you may want to leave the Curve Resolution on Low while you’re preparing your piece, and then change it to High just before you print on a non-PostScript printer. If you have a PostScript laser printer, these settings have no effect on your printouts.
- Underline Depth. The number in this text box sets the distance, for underlined text, between the underline itself and the baseline of the text.
- Underline Thickness. The number in this text box sets the thickness, for underlined text, of the underline itself.
- Shape Designer Slur Tip Width. This setting determines the thickness of the curved line at the end of a slur in the Shape Designer.
See Also:
Shape Designer dialog box
Document menu/Document Options


