- Enter the music in the usual way (all on one
staff).
- Choose Window >
Advanced Tools. Click the Note
Mover Tool
 . The Note Mover
menu appears.
- Choose Note Mover > Cross Staff.
- Click the measure containing the notes in question.
A handle appears on each note.
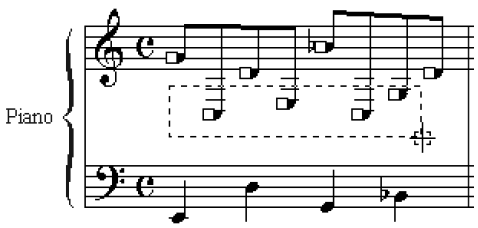
- Select the notes to be moved. You can
select a single note by clicking its handle, additional notes by SHIFT-clicking
their handles, and a group of notes by drag-enclosing them. When selected,
the handles become highlighted.

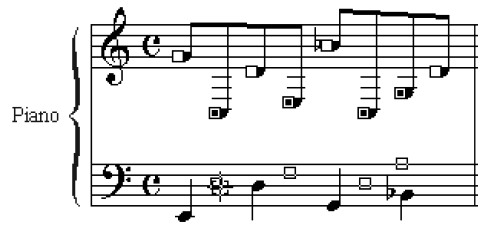
- Drag any selected handle to the desired target
staff. As you drag the single handle, all selected handles move
simultaneously. You don’t need to drag the handles to any particular pitch
on the new staff—simply release the mouse button when the cursor is directly
on the target staff, and you’ll find that the notes have now moved to
the new staff. Their beams and stems, however, still originate in the
source staff.

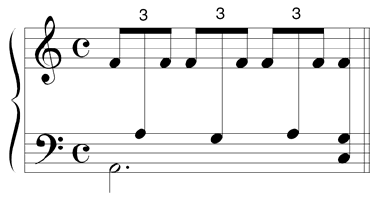
If you have a relatively simple cross-staff
notation, you’re done. If you need the beam in the middle, continue with
the instructions below.
- Choose Window >
Advanced Tools. Click the Special
Tools Tool
 , and click the measure
in question.
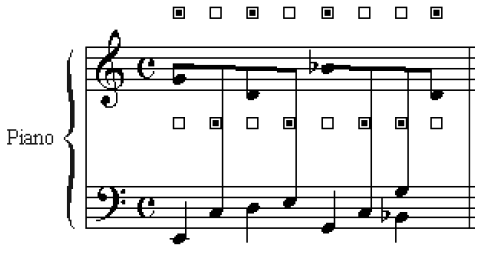
- Click the Reverse Stem Tool
 .
A handle appears above and below each note or chord.
- Click the upper handle (for an upstem note),
or the lower handle (for a downstem note). Finale responds by attaching
the stem to the opposite side of the notehead. For notes you want above
the beam, click on the upper handle. For notes you want below the beam,
click on the lower handle.

- Click the Beam Angle Tool
 . A handle appears at the beginning and the end of
the beam.
- Drag the left handle down to move it to the
position you want.Drag the right
handle up or down to change the beam angle. To restore the beam
to its default angle and height, click the handle you used to change the
position of the beam and press DELETE.


